Lonely Moose Designs

Life of an Interior Design Student........

Wednesday, July 20, 2005

End of the Quarter

Ok...here's the awful truth:
At the end of the quarter, this is what my studio looks like........


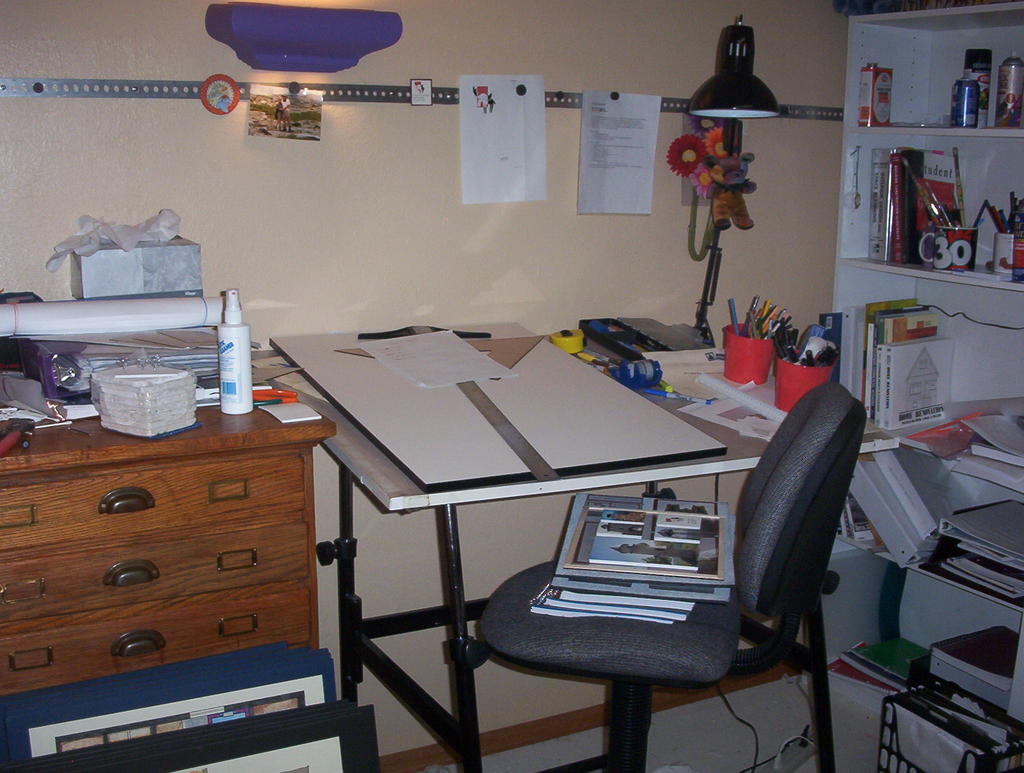
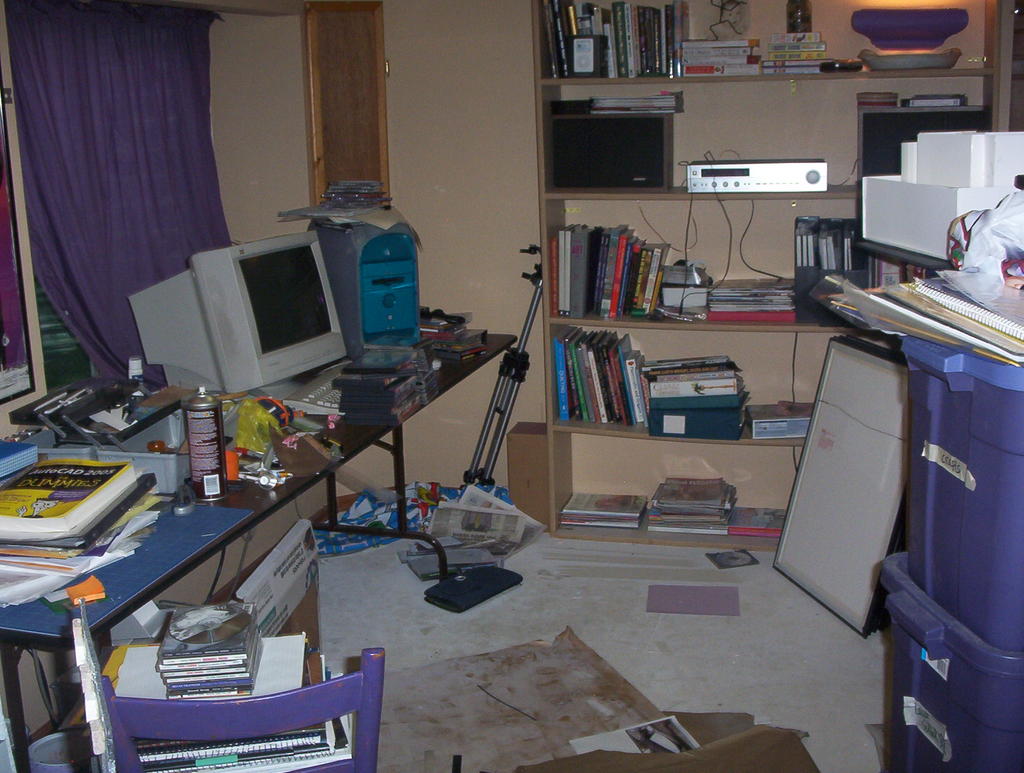
Yep...this is where all the magic happens. Hard to believe, eh?

Villa Savoye

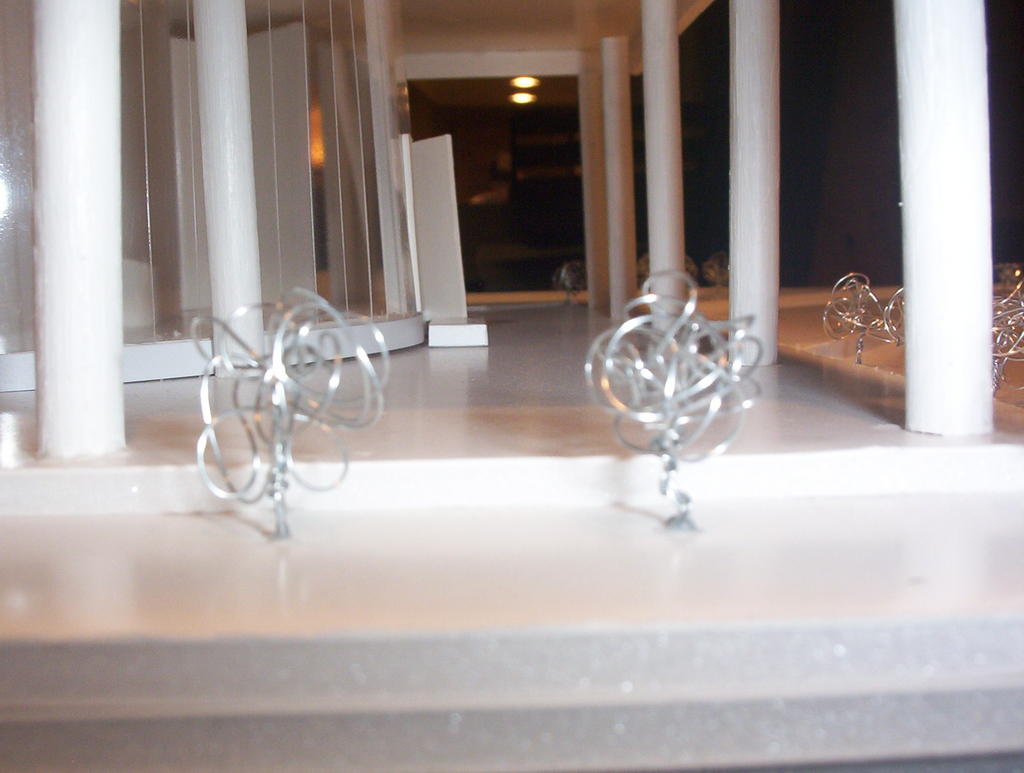
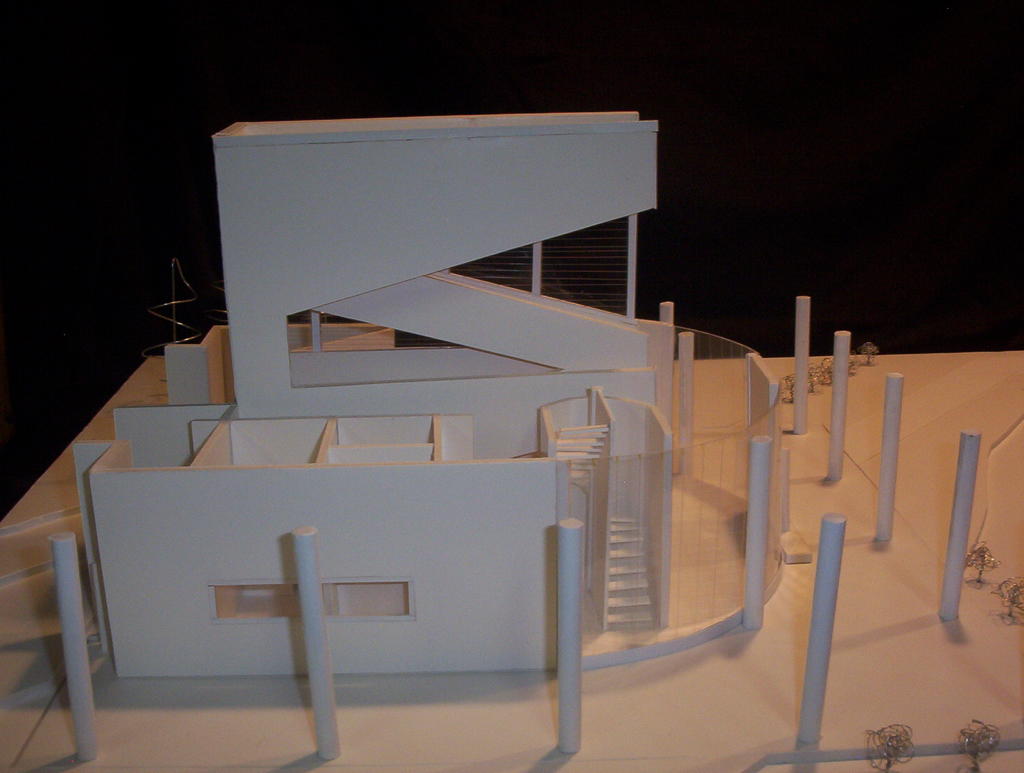
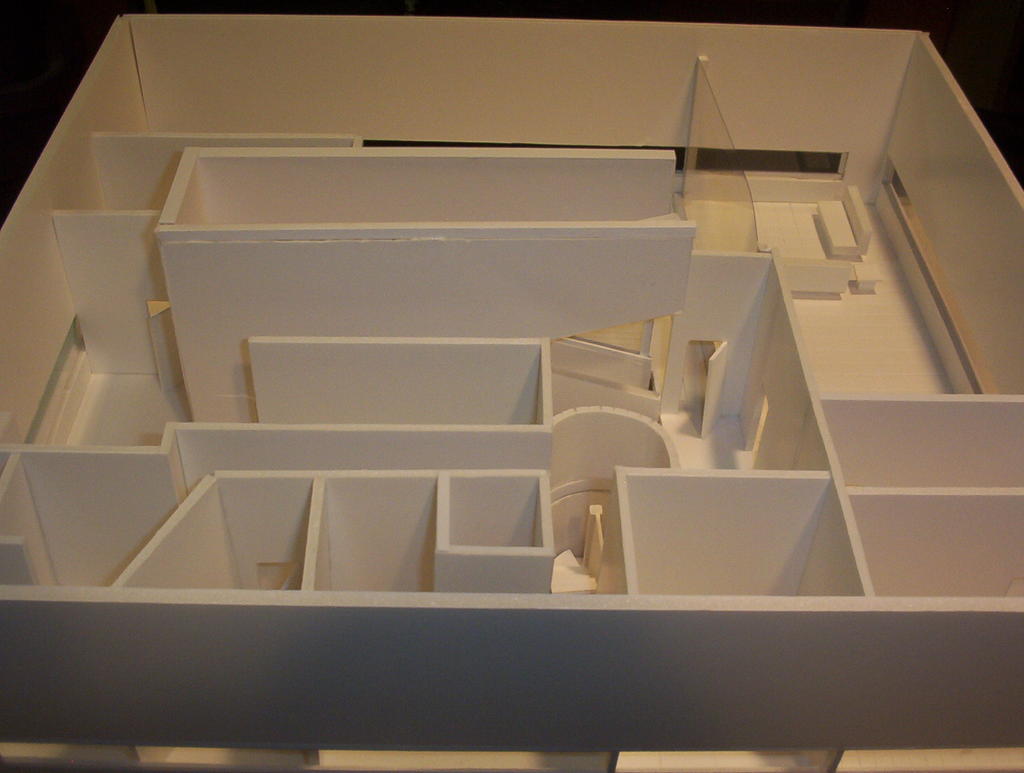
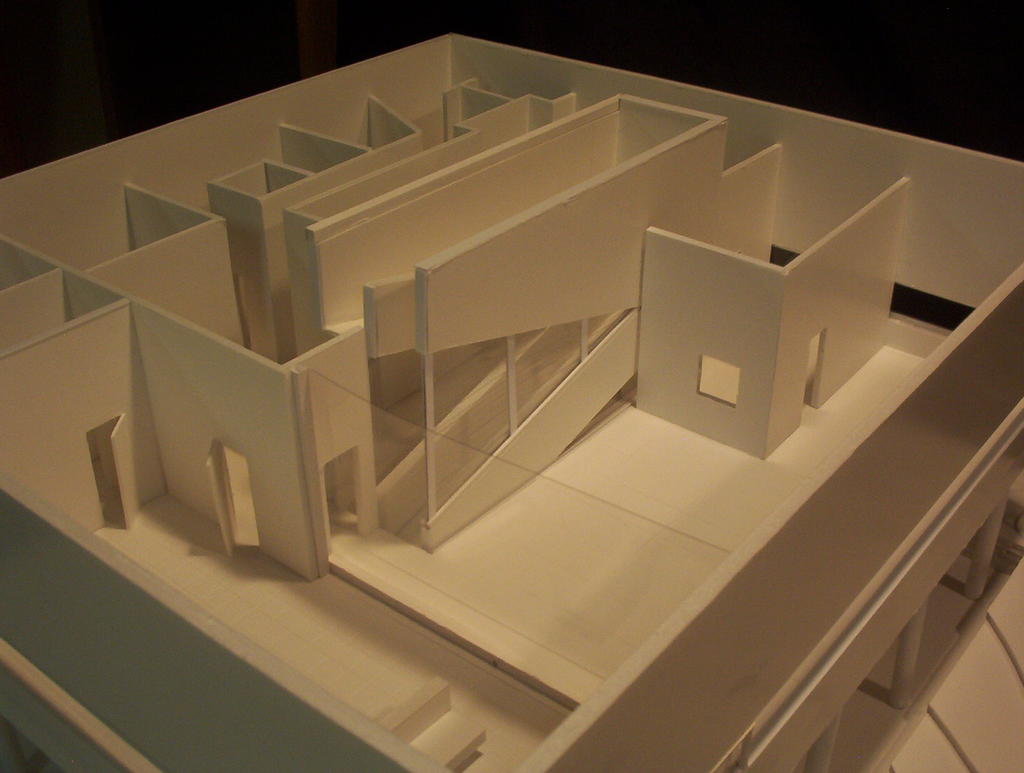
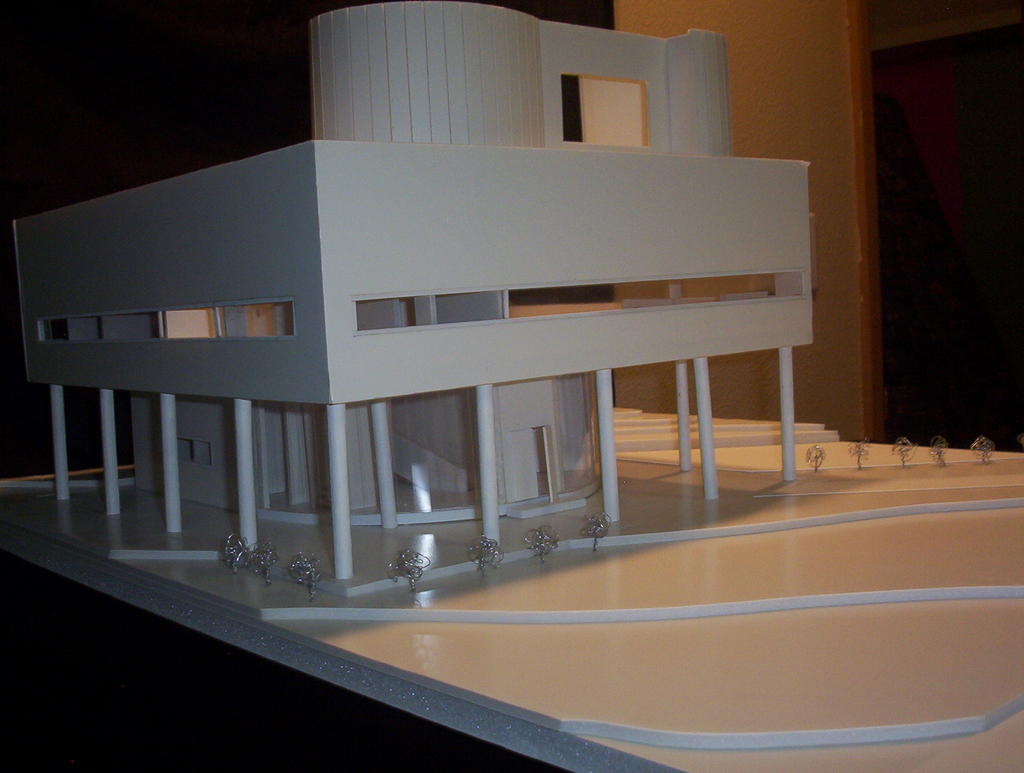
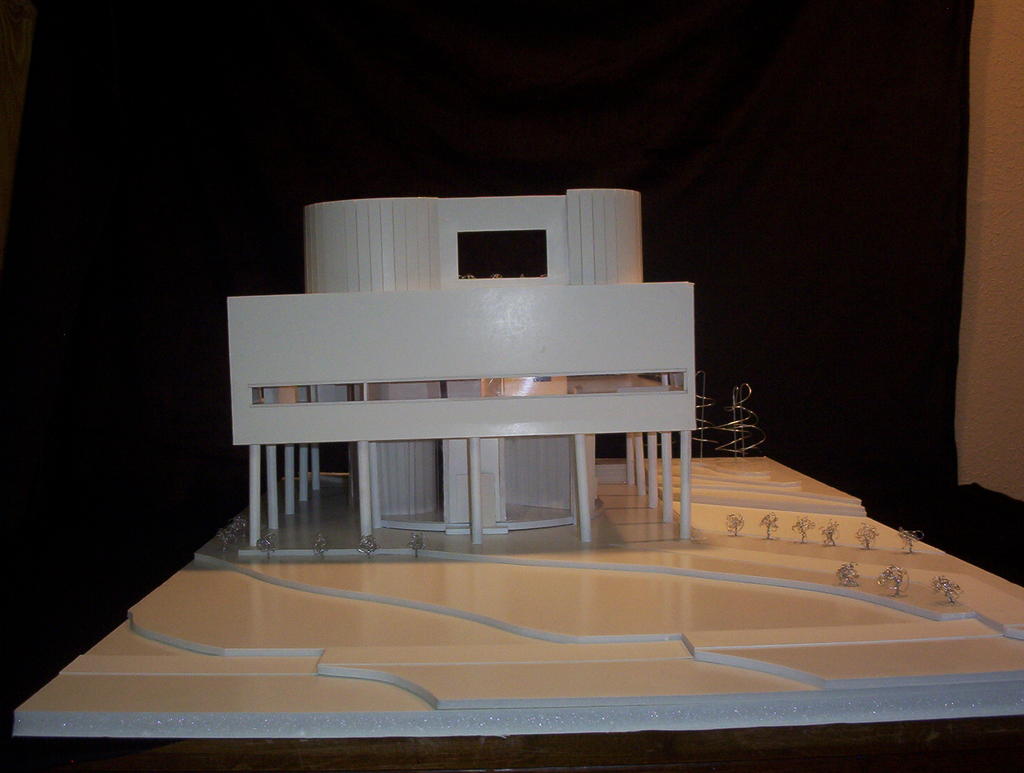
Ok...this is the Villa Savoye by Le Corbusier. It is located in France and was built in 1920. A key piece in architecture, this was the first "modernist" structure built. Forget all its structural flaws; the leaks, the cracks, lack of heat, too hot in summer (basically, BAD DESIGN)....all beginning design students get to study this one!

After hand drafting the floor plans for this building using a grid system and nothing more than deductive reasoning, we had to BUILD this model. You can find anything and everything on the internet...EXCEPT measurements for this building!!!!! ARGH!

Model is made from foam core (1/8", 3/16" and 1/2"), lexan and styrene. Total cost: about $300 (still adding up receipts).

For more pictures of the construction phase....see me at www.flickr.com. Look for me as "lonely moose"...you can find an entire photo set. For more information on the Villa Savoye...look it up on Google!!!

Entire plan drafted by me. Model and all construction done by me. April-June 2005.

Enjoy it now because I plan to set it on fire and film it....kind of a performance piece. :)

(burning down the house.....)

Final Model Pictures

Below....the final pictures of my Villa Savoye model. What a pain this was. Bottom line: some things worked out well and some could have been much better. You get to a point, however, after 11 weeks of work and more than $300 put into the project that you just say "whatever".....!!!!!! I got an A...better than I thought I'd do. I am glad this class is over.

Final Pictures


Tuesday, July 19, 2005

Bathroom Remodel Project- June 2005

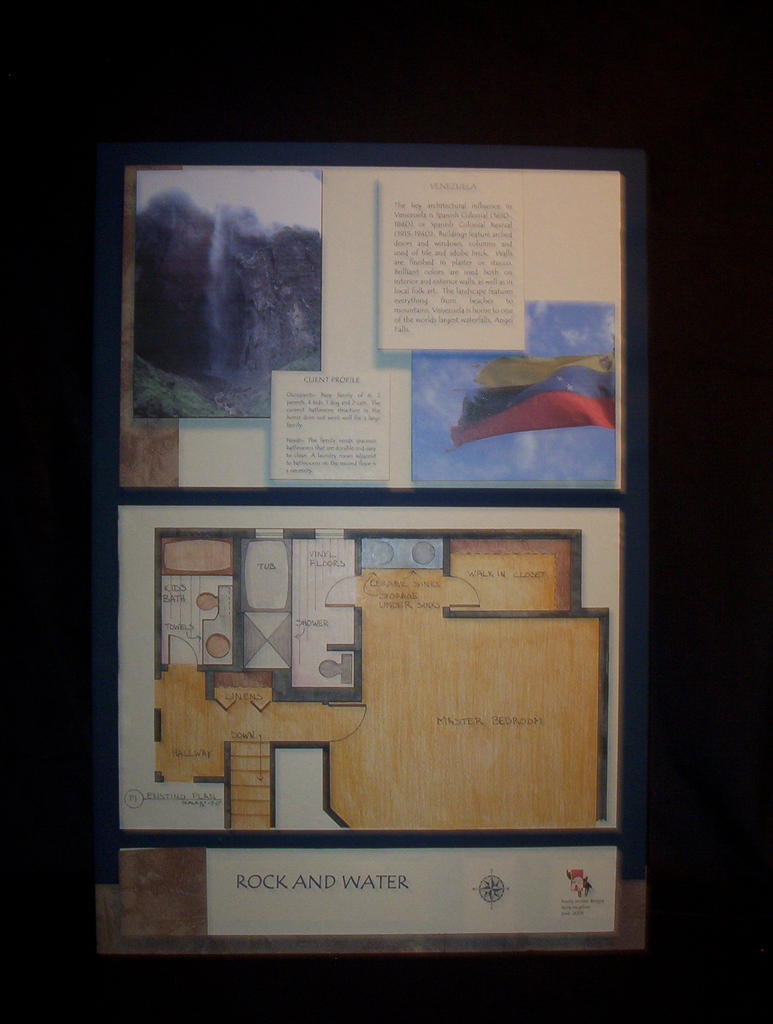
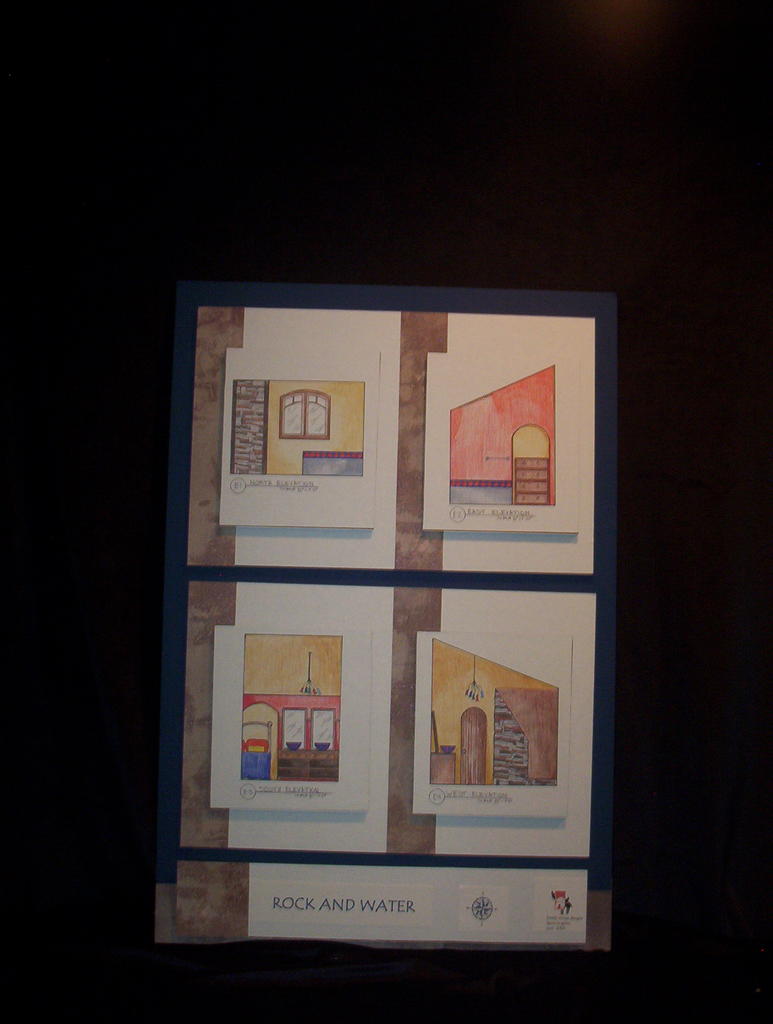
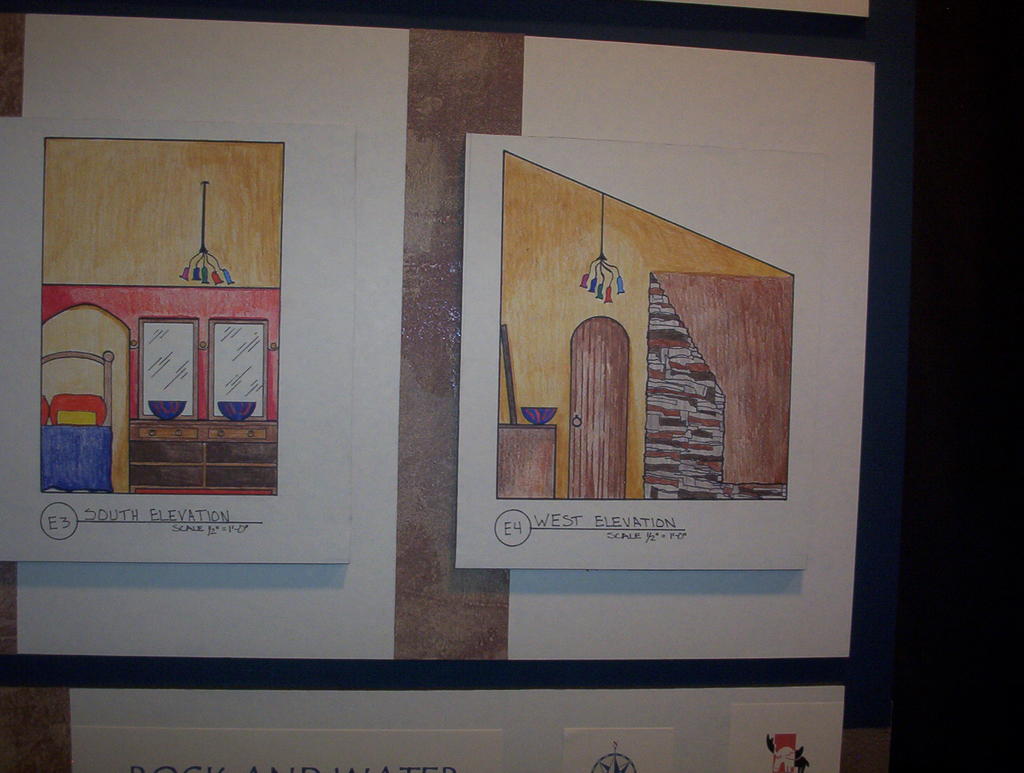
This project was a bathroom remodel...of course, I chose MY bathroom of MY ACTUAL house. Pretty exciting!!! Again....if anyone out there has an extra$150K, I could start construction right away! :)

The parameters of the project: Each person had to remodel an existing bathroom in the style of a country drawn at random. I picked Venezuela. My concept was less about the cultural aspects and more about the landscape; the rock and the water, along with a bright color pallette.

Some other parts of my program:
  • Move the first floor laundry room to the second floor.
  • Create better traffic flow in the kid's bathroom.
  • Create a personal water closet area in the master bath.
  • Master bath needs a jetted tub for two.

This board shows the original floor plan of the second floor; to include the existing master bath, bedroom, hallway and kid's bathroom.

All drawings and floor plans are hand drawn and rendered with Prismacolor colored pencils.

Bath design, concept, drawings and boards were created June, 2005.

Proposed Bath Design


This board features the new (proposed) design for the master bath, as well as the second (kid's) bath and laundry area.

The kid's bath area has been reduced to one private bathing area, with double vanity sinks outside the door. This provides a more efficient flow and usage of the bath area for a large family. Around the corner from the sink area is the laundry room, moved from the first floor to the second for maximum efficiency.

The master bath area has been entirely re-worked. A private water closet has been created and the double sink/vanity area are no longer facing the bedroom. A half wall with an arched doorway separates a semi-open bath plan from the master bed area. The shower is flagstone and has a Kohler body spa waterfall in addition to a regular 'rain style' shower head. The large jetted tub seats two and has chromotherapy lights built in. The tub has Venezuelan tile. The vessel style sinks are custom blown glass in a cobalt blue. The chandelier lighting is also custom made in rainbow colors. The floor is stone tile and continues into the walk-in closet/dressing area.

Bath Perspective (proposed)


This board features the proposed design in perspective. You can get a good look at the rock shower and chromotherapy jetted tub.


The south wall (sink/vanity area) is removed in this drawing so you can see into the entire master bath.

Bath Elevations


All four elevations (north, south, west, east) of the proposed bath.

Bath Reflected Ceiling Plan & Fixtures


This board shows lighting placement (reflected ceiling plan) as well as some of the fixtures used in this project.

Kitchen Remodel Project- May 2005

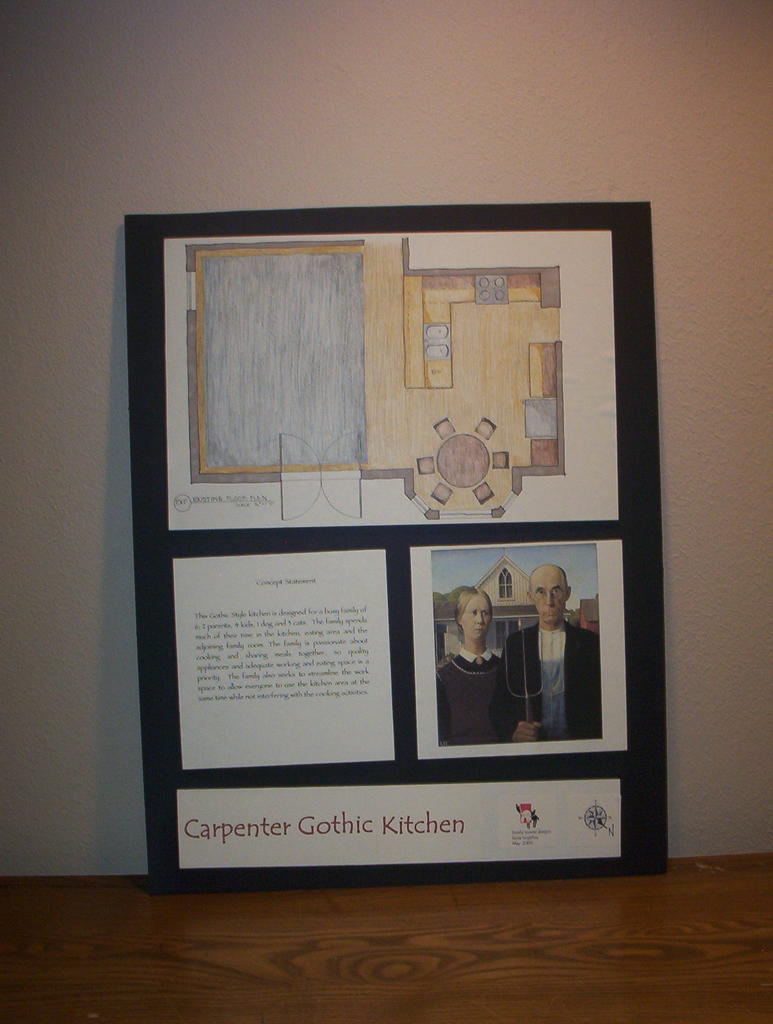
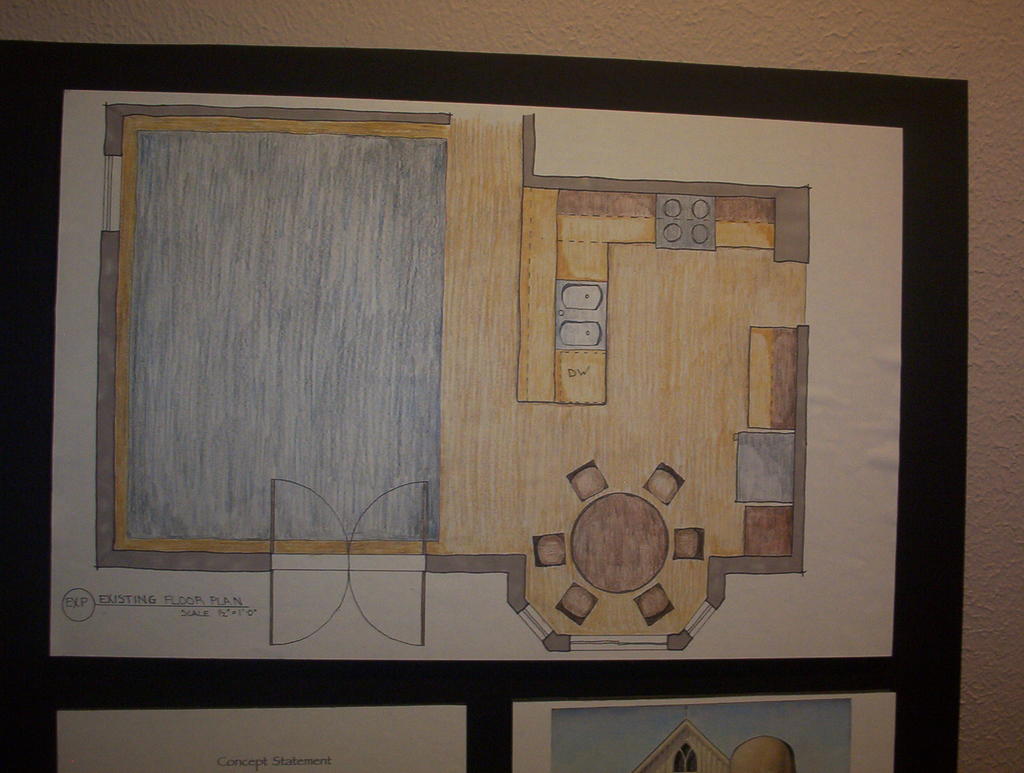
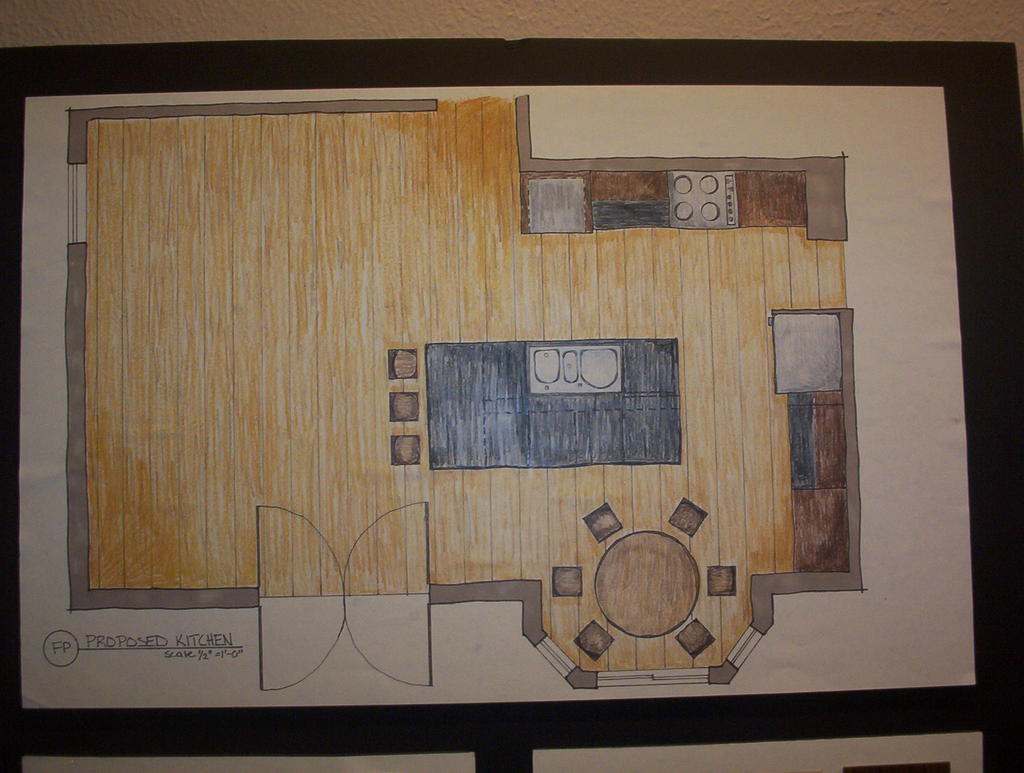
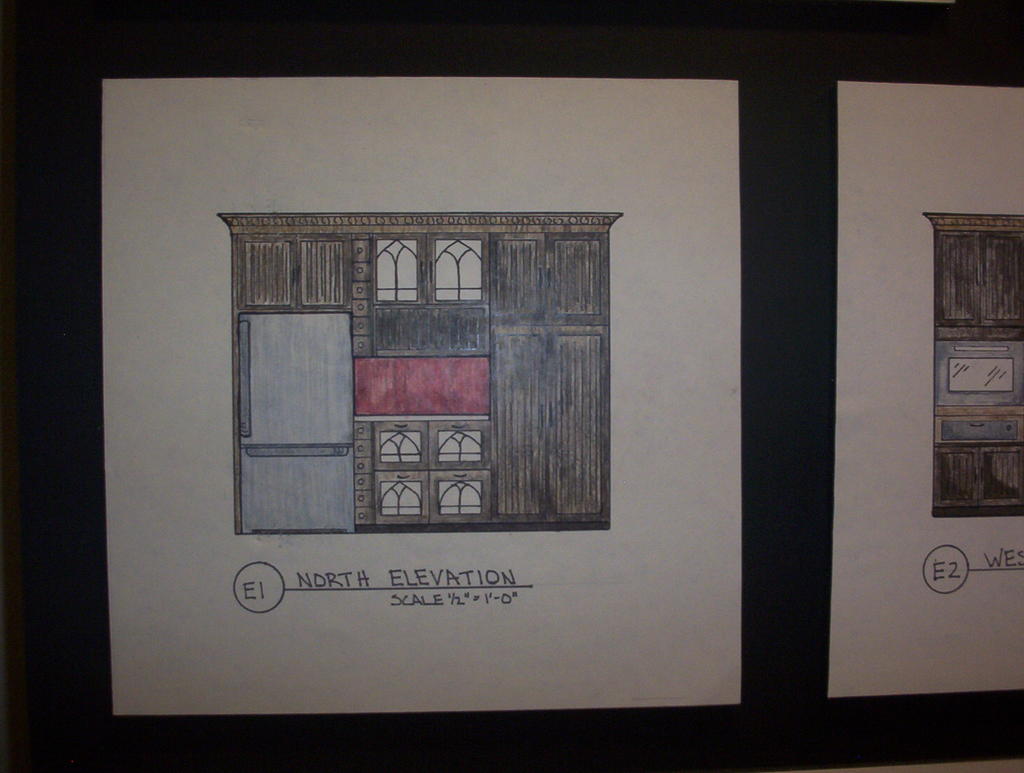
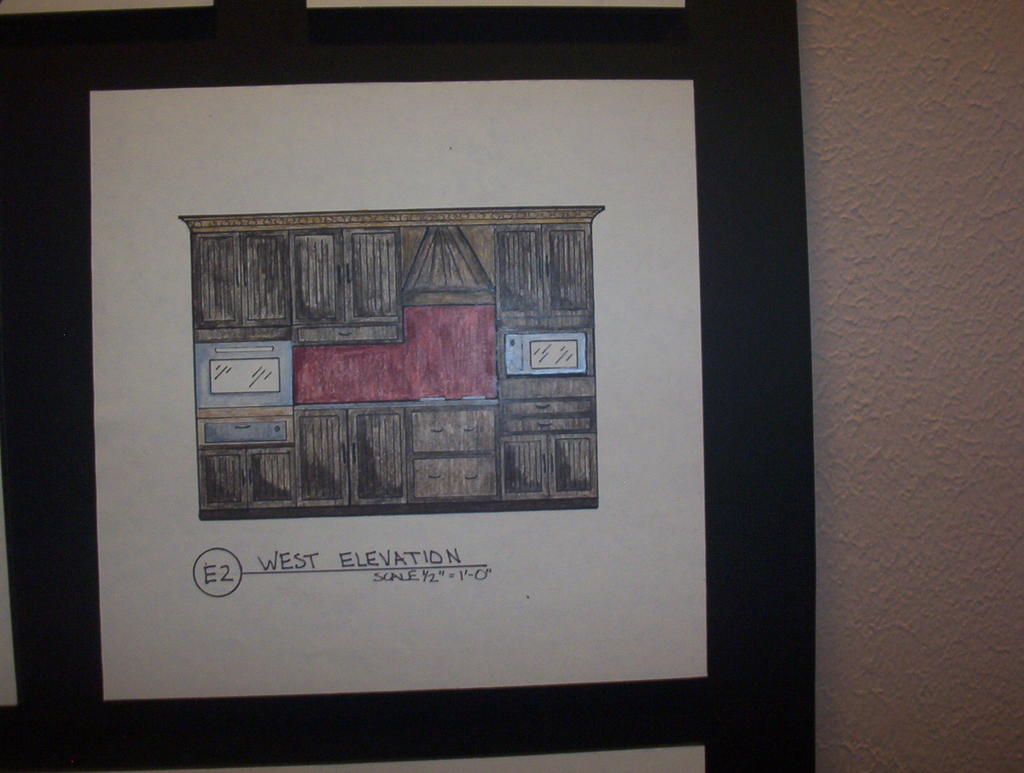
Project: Remodel and existing kitchen. Of course, I chose MY kitchen of MY ACTUAL house...so this was a FUN project. If anyone wants to send my about 200K, I can get started on the construction!!! :)

The project parameter was to remodel in a randomly chosen style...and I happened to choose "Gothic." Probably not how I would ACTUALLY remodel my own kitchen, but it was worked out ok. I went with the Carpenter Gothic, which was more "modern" and fit my personal tastes more than a traditional high Gothic style would have. So, the proposed (new) floor plan you will see is the plan I would really like to have...but the gothic style is probably not my first choice.

Existing floor plan is a broken U-shape kitchen with a peninsula. The kitchen is connected to the family room. The client (myself) wants more kitchen space for family activities and is willing to sacrifice some of the family room space. Both rooms need to be unified to create one environment.

Below are photos (not great ones) of the boards I created for my kitchen remodel. All drawings were rendered (colored) by hand using prismacolor colored pencils. All drawings were drawn by hand (including floor plans) and were not produced using AutoCad or any other computer program.


Kitchen design, concept and boards were created May, 2005.


Existing (old) Kitchen Perspective


This drawing is a perspective of the existing kitchen before the remodel. Very outdated for a large family.


**Note** Ok, bad picture...PLUS the foam core that the drawing is mounted on is crooked. It SLID to the LEFT overnight and I didn't notice it until my presentation. It turned out to be pretty funny...but I still have to remove the drawing and remount it for my portfolio. Grrr.

Proposed Kitchen Perspective


This is a perspective view of the new (proposed) kitchen.

New (proposed) Kitchen Floor Plan

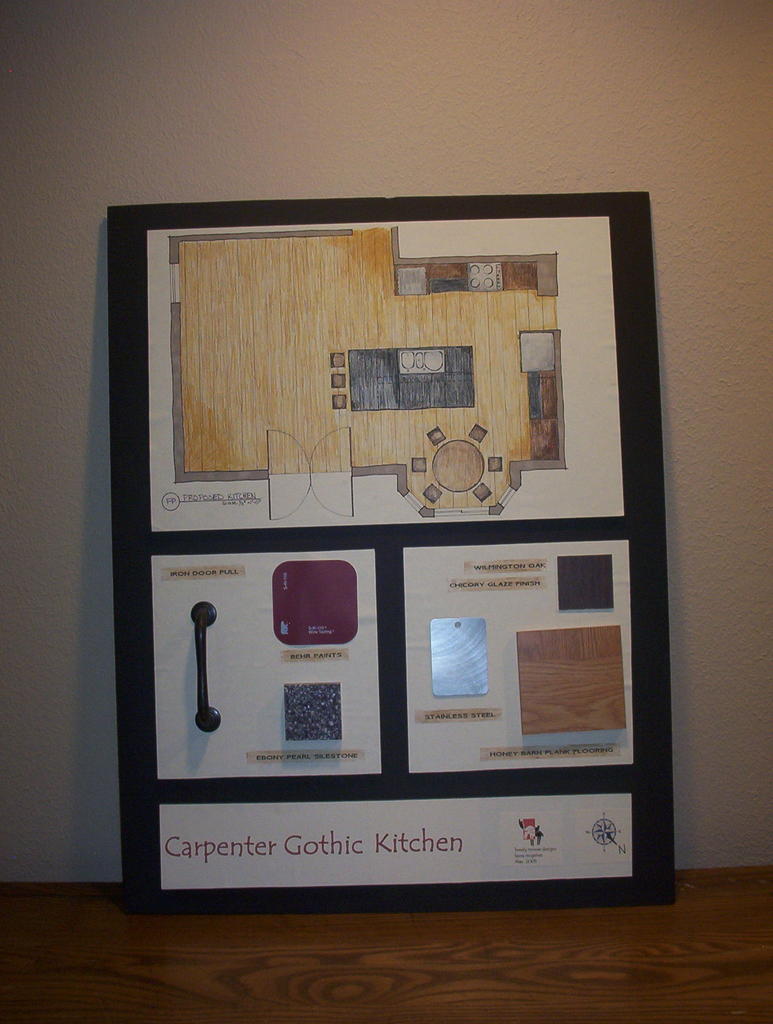
Here is the proposed floor plan. The peninsula from the old floor plan has been removed to make room for the island. The island is 2 levels and will allow for food prep, washing, and eating. A wine cooler, ice maker and 2 drawer diswasher are built into the island.

The kitchen island has crept into the space of the family room, but is now more open for family activities, eating and conversation...and the family room really hasn't lost a lot of space! The flooring is reclaimed barn planks, 8" wide, that cover the entire kitchen and family room. Countertops are Ebony Pearl Silestone. All appliances are stainless steel. Paint "Wine Tasting" color by Behr. All cabinet and drawer pulls are iron. Cabinets are by Kraftmaid and are Wilmington Oak with a Chickory Glaze finish.

Cabinet Nomenclature & Work Triangles.


This board shows the North and West elevations, as well as the nomenclature for all the cabinets. Work triangles are also shown.

Kitchen Elevations


Two elevations from the kitchen, the North and the West, fully rendered. Leaded carpenter gothic arch glass fronts to the kitchen cabinets. Oven, warming drawer and microwave are in the wall, separate cooktop with pan storage drawers below. All appliances are stainless steel.

Project Princess


This is a presentation board that I made for a little girl's room. The concept was about fairy tales and was designed around a collection of fairy tale paintings that the little girl had made. The board is made from an 11x14 painter's canvas and the wall colors are shown on the canvas. The white chair rail is also shown, in place and in order with the wall colors to give the client a visual of how the room will look. Other materials shown are : oak flooring, Laura Ashley bedding, sheer sparkle drapes and sheer purple pillows. The purple tulle surrounding the board represents the sheer canopy over the bed.

Design, Concept and Board created March, 2005.